Good morning friends! The OSAT design team is doing a masculine themed hop this month. The projects I chose for it is actually for Tinker Tom (aka Mr Sullivan) for Father's Day. So hopefully he doesn't read my blog! HA! But, as it is, I'm being sneaky about creating these projects AND about photographing to share them here with you. SNEAK ATTACK!! hehehe!
One of Mr Sullivan's passions is for our local Fire Department. He is a Lieutenant and is so proud to serve our community with our Volunteer Dept. Of course, we are super proud of him too! A great many dinners interrupted and sleepless nights for us to support our beloved Firefighter! So when I saw Miss Tami's Firefighter card made from the Suit & Tie Dies, I knew I had to case the idea. With that being said, my disclaimer is that I am CASE-ING my card for today. It's a terrific card and she did an awesome job designing it. I used the same concept to create the box for Mr Sullivan's gift. He's gonna love it! And just in case he DOES read my blog, I'm not gonna share what the gift is. lol. But I will share the box. :-D
One of Mr Sullivan's passions is for our local Fire Department. He is a Lieutenant and is so proud to serve our community with our Volunteer Dept. Of course, we are super proud of him too! A great many dinners interrupted and sleepless nights for us to support our beloved Firefighter! So when I saw Miss Tami's Firefighter card made from the Suit & Tie Dies, I knew I had to case the idea. With that being said, my disclaimer is that I am CASE-ING my card for today. It's a terrific card and she did an awesome job designing it. I used the same concept to create the box for Mr Sullivan's gift. He's gonna love it! And just in case he DOES read my blog, I'm not gonna share what the gift is. lol. But I will share the box. :-D
Ok, as I said, this is not my design. But I think it's spectacular and absolutely perfect for my needs. I will show you step by step how it's made. (read here, this post is photo HEAVY. lol)
Isn't it just the coolest? I love that it looks so much like a fireman's jacket. Of course, I probably SHOULD have done Sahara Sand instead of Poppy Parade for the base of the jacket because that's what color Mr. Sully's is. It's ok. He'll love it anyways!
After I've cut and glued each piece, I put the lid onto the base to ensure a good fit. (That's an important step! lol)
From LEFT to RIGHT:
4 buttons in Basic Black (stuck onto glue dots)
4 buckles in Basic Black (aka suspender clips)
1 little stitched strip in Poppy Parade
1 collar in Poppy Parade
2 strips of Smoky Slate cut at 1/8" x 6"
4 buttons in Basic Black (stuck onto glue dots)
4 buckles in Basic Black (aka suspender clips)
1 little stitched strip in Poppy Parade
1 collar in Poppy Parade
2 strips of Smoky Slate cut at 1/8" x 6"
1 Stitched Strip in Poppy Parade
2 Stitched Strips in Daffodil Delight
2 Stitched Strips in Daffodil Delight
As you can see, only the Smoky Slate strips aren't cut from the dies.
Everything else for both the card and the box will be the same.
Once you have your first layer, you'll need to use that V shaped die to cut the v-neck out of that layer.
I use washi tape to hold it centered in place so that my shirt doesn't go wonky. "Ain't nobody wanting a wonky shirt!" lol.
I hope you enjoyed my projects! I had such a terrific time creating them! Be sure to click the "NEXT" button to visit Miss Tina's blog and see what fantastic masculine projects await you there! Hop all the way around to make sure you don't miss anything! :-D
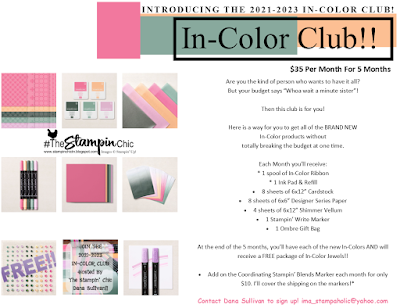
Do you just LOVE the new In-Colors and want to have them all? Join my In-Color Club and get a fantastic selection of products featuring the new In-Colors, at a price that doesn't make your pocketbook scream! Now you CAN get all the things!! PLUS, get a set of the new In-Color Jewels FOR FREE!! To get all the details and to sign up, click the image below. :-)
Registration is NOW OPEN for an Artistically Inked Blue Ridge Stampin' Escape! JOIN ME!! Click the image below to go to the details page and to register. It's a ton of fun you don't wanna miss out on!
To receive the 2021-2022 Annual Catalog (Idea Book), click the image here to go to the request form!
Until Next Time,
Happy Crafting!
#TheStampinChic
Happy Crafting!
#TheStampinChic
If you would like to purchase any of the supplies I used on today's project, simply click an image below to be taken directly to my website. Enjoy!


No comments:
Post a Comment