Sunday, October 31, 2021

Happy Halloween!

Happy Halloween my crafty friends! It's the time of year where a kid (or adult) can dress up and pretend to be anything they want. What fun?!  I love all the spooky and fun things about Halloween.  

Speaking of FUN THINGS, I thought I'd share another example of why I LOVE LOVE LOOOOOOOVE Stampin' Up!  Is it ok that it's non "stamping" related?  Trust me, you'll love this!

Each year, Stampin' Up headquarters holds a FALL FEAST for their employees.  There's food, fun, games, prizes, and did I mention fun?  

Ms. Sara Douglass (CEO) shared some photos from this year's costume contest and all I can say is OH MY GOODNESS!!! No wonder these folks come up with such beautiful products! They have incredible imaginations!!


Their shirts say "Happiest Place To Work"! lol. So cute! And, I'll bet it IS the happiest place to work! What fun!


HAY Girls!


Harry, Ron, and Hedwig! I mean, c'mon! So cute!


This one made me laugh so hard!! It's our world at present, right?  Business on top, party on bottom! haha! And do you recognize these people?  Only the top folks in the company! CEO Sara Douglass (far right), and her mama Shelli Gardner (2nd from Left) Co-Founder of the company!  How much fun must they be to work with? I LOVE IT!!  Love what you do, and you'll never "WORK" a day in your life!!


This one was probably my favorite! HILARIOUS!!! Check out the names of those ink pads! hahahaha!  Their back sides said Stampin' Up Rejected Names. hahaha! Pretty clever!


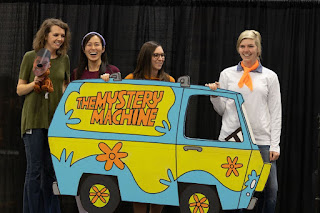
Hey Scooby!! 


In addition to the Costume Contest and other festivities, there was a pumpkin art gallery.  I mean, these folks are CLEVER!!!  And, I do believe they had way too much fun! How can you even call this "work"??? :-D  Check out these fabulous 'works of art'.


Happy people indeed!  

I'm so proud to be a part of a company that can have fun while getting the job done! It's always so neat to see the various activities that Stampin' Up does with their employees.  Darn! If only I lived much closer to headquarters!! ;-) 

I hope you all have a safe and fun Halloween my friends!!  


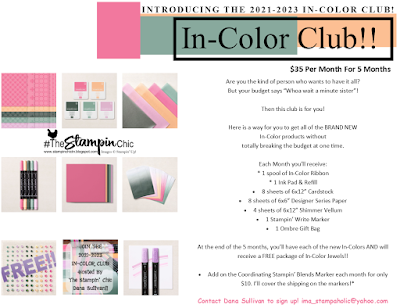
Do you just LOVE the new In-Colors and want to have them all?  Join my In-Color Club and get a fantastic selection of products featuring the new In-Colors, at a price that doesn't make your pocketbook scream! Now you CAN get all the things!! PLUS, get a set of the new In-Color Jewels FOR FREE!!  To get all the details and to sign up, click the image below. :-) 


To receive the 2021-2022 Annual Catalog (Idea Book), click the image here to go to the request form!


Until Next Time,
Happy Crafting!
#TheStampinChic

Wednesday, October 27, 2021

Whimsy & Wonder CASE-IT Wednesday


Hello there friends! Today, I have not just one but TWO fabulous CASE-IT projects to share with you!  Well, that's because the Whimsy & Wonder product collection is just THAT beautiful!  

Page 24 of the July/December 2021 Holiday Catalog is where we're taking these gorgeous projects from.  You'll find not only super pretty projects, but the Whimsy & Wonder Suite which is absolutely STUNNING!

Project #1 is a card I've been wanting to CASE since I laid eyes on it this summer! SOOO PRETTY!!

Here are the measurements I used (which may or may not be exact or near exact of the card in the catalog): 

* 8 1/2" x 5 1/2" Blushing Bride Card Base (scored at 4 1/4")
* 4" x 5 1/4" Whimsy & Wonder Snowflake DSP
* 3 1/4" x 4 1/2" Vellum Cardstock
* 4 1/4" x 3/4" Strips:
        - (cut 2) DSP
        - (cut 1) Soft Succulent
        - (cut 1) Blushing Bride
        - (cut 1) Misty Moonlight
* 4" x 5 1/4" Basic White Cardstock for inside panel
* 1 3/4" x 3/4" Shimmer White Cardstock for sentiment
* 2 3/4" x 4 1/4" Shimmer White Cardstock for die cutting trees
* Scrap of Misty Moonlight for tree stars
* Scrap of Mint Macaron for tree garland
* 1 Wonderful Iridescent Snowflake
* Genial Gems
* Blushing Bride Frayed Ribbon
* Linen Thread

You'll also need a Polished Pink Ink pad and a DARK Mint Macaron Stampin' Blends Marker.  The Stampin' Blends Marker is needed to color the backside of the snowflake. Coloring the backside magically puts a lighter shade of the color through to the iridescent side! It's wild! 


You can see by looking at the pictures, that the card is actually pretty easy to assemble. Layer the Blushing Snowflake layer on the card front.  Attach the strips across that (nearer the top than the bottom). Add the Snowflake to the center. Strategically attach the Vellum to the top. Then add the die cut pieces and the sentiment.  

I will suggest that you stamp the "JOY" onto the shimmer paper first and set it aside. It'll need a few minutes to dry good and even then, I would be careful not to smudge it when adding it to the card. It will dry really nicely. It just takes a few minutes on that Shimmery Cardstock. :-) 


The next CASE-IT project is on the same page.  I have been looking at that adorable "bag"/pocket and wanting to CASE-IT for a while. I'm glad to finally be getting to it!  The completed bag is 5" x 5 1/2" and opens up wide enough to add some fairly flat items.  This would be a terrific Gift Card or money Holder!  It's also big enough to hold most of Stampin' Up embellishment sheets. It's wide enough to hold a card, but not quite tall enough to conceal it completely. 

You'll need: 
* 3 sheets of Kraft Paper (cut 1) 5" x 6" and score at 1" on the long side, (cut 2) 3 1/2" x 5" and score at 1/2" on the short side.
* 2 3/4" x 3 3/4" Soft Succulent Cardstock for Tag
* DSP to die cut tree, and fussy cut two gifts
* 1 Wonderful Iridescent Snowflake
* Blushing Bride Frayed Ribbon (this project takes a LOT of this ribbon. But it's totally worth it!)
* Essentials Baker's Twine


For this project, you'll also need Crumb Cake Ink to make the background pattern on the bag. I used the big dotted tree stamp from the Stamp Set to stamp all over all three panels, creating this fun speckled background. It really didn't take long. The stamp is big. :-) 

You can see how I create the card, bag, bow, and tag in my video: 


Please consider SUBSCRIBING to my channel while you're there and give the video a THUMBS UP if you like it! :-) 


I hope you enjoyed getting two CASE-IT projects today! I know it never happens that way, but I felt sure these needed to be shared together instead of individually. :-) 

Do you just LOVE the new In-Colors and want to have them all?  Join my In-Color Club and get a fantastic selection of products featuring the new In-Colors, at a price that doesn't make your pocketbook scream! Now you CAN get all the things!! PLUS, get a set of the new In-Color Jewels FOR FREE!!  To get all the details and to sign up, click the image below. :-) 


To receive the 2021-2022 Annual Catalog (Idea Book), click the image here to go to the request form!


Until Next Time,
Happy Crafting!
#TheStampinChic

If you would like to purchase any of the supplies I used on today's project, simply click an image below to be taken directly to my website. Enjoy!

Product List