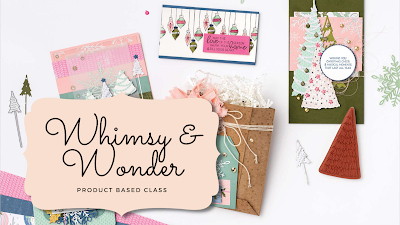
Good evening friends! How are you this fine Tuesday? I have a special card to share with you tonight. I think you're gonna love it! I really enjoyed creating it.

I wanted a sort of over the top card for a sweet friend of mine who really helped me a lot recently. So, I had her in mind when creating this card. She loves fancy folds and this one is really unique!

The base of the card is actually more like an envelope of it's own. This project uses quite a bit of cardstock, but is well worth it.
Here's what you'll need:
* Polished Pink Cardstock 9" x 5 1/2" (scored at 2 3/8" & 6 3/4") for base
* Polished Pink Cardstock 9" x 5 1/2" (scored at 2 3/8" & 6 3/4") for base
* Polished Pink Cardstock (cut 2) 4 1/4" x 3 3/8" (scored at 2 7/8" on the short side) for top & bottom flaps
* Polished Pink Cardstock 4" x 5 1/4" (die cut with largest Scalloped Contours Die) for front piece
* Expressions In Ink Designer Series Paper (DSP) (cut 2) 3 7/8" x 2 3/4" (round two corners on long side) for top & bottom flaps
* Expressions In Ink Designer Series Paper (DSP) 2 1/4" x 5 3/8" for left flap
* Expressions In Ink Designer Series Paper (DSP) 2 1/8" x 5 3/8" for right flap
* Expressions In Ink Designer Series Paper (DSP) 4 1/8" x 5 3/8" for inside panel
* Expressions In Ink Designer Series Paper (DSP) 3 1/4" x 4 5/8" for front piece
* Expressions In Ink Designer Series Paper (DSP) 3 3/8" x 3/4" strip for sentiment on front piece
* Expressions In Ink Designer Series Paper (DSP) 9 1/2" x 1 3/8" strip for belly band
* Gold Foil 3 3/4" x 4 1/8" for die cutting large flower cluster
* Gold Foil 2" x 12" strip for die cutting TWO leaf clusters
* Basic White Cardstock 2 3/4" x 11" strip for stamping and die cutting 2 large flowers, 4 leaf pairs, and one sentiment strip (3 1/4" x 7/8"

Use the Detailed Trio Punch to round the corners of the top and bottom flaps (but NOT the side flaps).
Now that the card base is assembled, attach the DSP panels in their appropriate places. I used the pretty pink marbled one for the inside panel. I wrote my message on it. You could replace this piece with a piece of Basic White Cardstock if you have a lot to say. It's up to you.
*NOTE: one side flap is slightly wider than the other. So be careful to attach the right DSP piece to the right flap. This is because the side flaps slightly overlap to close the card up.
*NOTE: one side flap is slightly wider than the other. So be careful to attach the right DSP piece to the right flap. This is because the side flaps slightly overlap to close the card up.
I used Multipurpose Liquid Glue to attach the leaf clusters to each of the inside of the side flaps.
Attach the front piece DSP to the die cut scalloped rectangle. Then attach the large flower cluster with Multipurpose Liquid Glue.
Next, cut the sentiment piece from the long Basic White Strip. Use the remaining strip to stamp two Polished Pink Large Flowers and four Shaded Spruce leaf pairs. Die cut all of the pieces and then layer them together as seen in the photos. You'll attach one flower cluster to the outer left flap of the card base with liquid glue, and attach the other cluster to the front piece with the glue.
Stamp "Thanks" in Versamark Ink on the sentiment strip, then Emboss with Gold Powder. Attach the little DSP strip to the backside of the sentiment piece and layer the whole piece onto the front panel with Stampin' Dimensionals.
Wrap the Belly Band around the card semi snug, but loose enough to slide back off easily. Attach ends together with liquid glue. Then, Use Dimensionals to attach front panel to the Belly Band (with the panel centered on the card).
Last thing to do is add some bling! This is an extravagant card, so go wild! I added several to the center of the flower and scattered a few around the front panel and sentiment strip.

I really hope you liked this neat card! I had a terrific time making it! One last note, this card may squeeze TIGHTLY into a regular Basic White Envelope, but would be better suited to make one with a 1/4" side space.
Would you like to get your hands on a BRAND NEW Stamp Set that's not even available for Demonstrator Pre-Order yet? Click the image to place a $50 order using the required HOST CODE. For every $50 ordered, you'll get an entry to win!

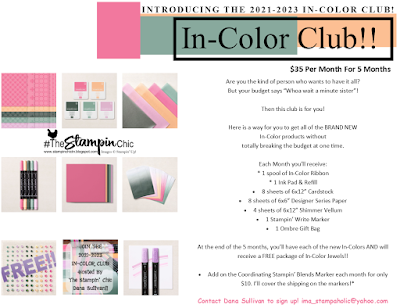
Do you just LOVE the new In-Colors and want to have them all? Join my In-Color Club and get a fantastic selection of products featuring the new In-Colors, at a price that doesn't make your pocketbook scream! Now you CAN get all the things!! PLUS, get a set of the new In-Color Jewels FOR FREE!! To get all the details and to sign up, click the image below. :-)
To receive the 2021-2022 Annual Catalog (Idea Book), click the image here to go to the request form!

Until Next Time,
Happy Crafting!
#TheStampinChic
Happy Crafting!
#TheStampinChic
If you would like to purchase any of the supplies I used on today's project, simply click an image below to be taken directly to my website. Enjoy!