

Good evening my crafty friends! Today we're joining the Paper Pumpkin Possibilities Blog Hop to share some fabulous alternative projects featuring the June 2023 "Welcome Inn" Paper Pumpkin kit.

This kit was so pretty and had some incredible features about it. First of all, we could purchase an adorable set of dies that coordinated with the kit. WOOT WOOT!! Who doesn't love dies?

Speaking of COORDINATION, the kit also coordinates with the Countryside Inn Suite of products from the new 2023-2024 Annual Catalog & Idea Book!!

I absolutely LOOOOOOOVE it when they do that!! It really opens up a whole world of possibilities for alternative projects, as you're about to find out in this month's blog hop! Let's get right to it, shall we?
My alternative project uses some of the coordinating products along with elements from the kit.

I started out by creating a stencil with the negative frames left behind by the large rectangle shape and the tall vase. I've shared how I make my stencils before. You can see it here:
https://www.youtube.com/watch?v=RffpvTej0Gw
https://www.youtube.com/watch?v=RffpvTej0Gw
I taped a 5 1/4" x 4" piece of Basic White Cardstock to the backside of my stencil to hold it in place. Then, I used Night of Navy Ink and a Blending Brush to add color around the inside of the frame. Start out light and work your way up to the darker and richer color. Remember, you can always add more, but you can't take off what's been put on!

Once I had the shading how I wanted it, I used the stem cluster stamp from the "LASTING JOY" stamp set to sort of frame the bottom sides of the rectangle area.
I used the tall vase stencil with Boho Blue ink to create a tall vase on Basic White Cardstock. Once it was colored, I stamped the big flower cluster from the kit in Night Of Navy Ink over top of it. After fussy cutting it out, it looks fantastic! LOVE IT!
If you do all the coloring and stamping with the stencils on, you get a really cool looking piece when you remove the stencil! LOVE IT!
If you do all the coloring and stamping with the stencils on, you get a really cool looking piece when you remove the stencil! LOVE IT!

From here, I used the Countryside Corners two largest dies and the Countryside Inn DSP to create the frame around my colored piece. I found that the 2nd largest die was the same size as the pieces in the Paper Pumpkin kit. YAY! I used the dimensional strips from the kit to attach it to the panel.
The card base is an 8 1/2" x 5 1/2" piece of Night Of Navy Cardstock (scored at 4 1/4"). Then, there's a 5 3/8" x 4 1/8" layer of Boho Blue Cardstock to add some flair. Once those layers are established, I attached my Basic White panel.
After I assembled my card front, I stamped nine of the single flowers with the stamp from the kit. The coordinating Welcome Inn Dies add-on proved handy to cut them all out! Some of the flowers I attached with Glue Dots. Others I attached with Stampin' Dimensionals, so that I could get some depth. I really like how it was looking at this point!

When all my flowers were attached, I was able to embellish and finish off the card.
I stamped the vase in Night Of Navy ink onto one of the die cut blanks. But you could also have used the coordinating Welcome Inn Dies to cut it. The Jute Trim shown below is from the 2023-2025 In Color Jute Trim Combo pack. I didn't want a thick bow, so I untwisted a strand out of the piece. PERFECT! Don't be afraid to dismantle or shred ribbons and trims. You find some incredible and often unexpected beautiful surprises!
I stamped the vase in Night Of Navy ink onto one of the die cut blanks. But you could also have used the coordinating Welcome Inn Dies to cut it. The Jute Trim shown below is from the 2023-2025 In Color Jute Trim Combo pack. I didn't want a thick bow, so I untwisted a strand out of the piece. PERFECT! Don't be afraid to dismantle or shred ribbons and trims. You find some incredible and often unexpected beautiful surprises!

I always say "NO NAKED INSIDES, AND NO NAKED ENVELOPES!"
This is how did the inside of my card. I used the same techniques of the vase and flowers to decorate my envelope. I like doing it that way because it ties the card and envelope in to each other. Matched set!
This is how did the inside of my card. I used the same techniques of the vase and flowers to decorate my envelope. I like doing it that way because it ties the card and envelope in to each other. Matched set!

As you can see from my finished card below, I attached the vases to the frame on the card front. I used two layers of Stampin' Dimensional near the top of each to give it balance from the height of the frame. I attached the single strand bow to the squatty vase with a mini glue dot and then added a few of the kit's low profile Night Of Navy embellishment dots.
Overall, I'm really happy with how my card turned out.

I hope you enjoyed my project! I really had a great time creating it for you. Make sure to click the "NEXT" button below to visit Ms Cheryl's blog. She'll have another amazing project to share with you! Hop all the way back around to ensure you don't miss any of the fabulous alternative project ideas we've got for you.

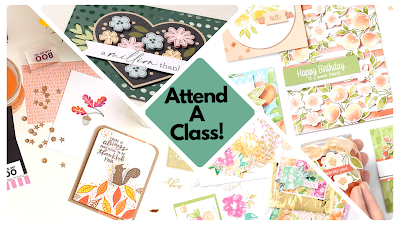
Check out my upcoming classes (and classes TO GO), over on my
Facebook Calendar of Events. Registration details can be found under each class description. Join us for some crafty fun!
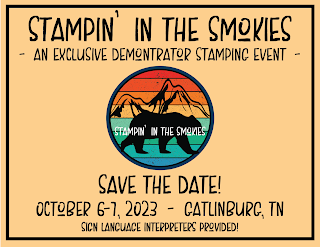
Are you a Stampin' Up! Demonstrator?
Join me and my friends for an exclusive event just for you!
We'll have networking sessions, make'n takes, goody bags, stampin' bingo and lots of fun!! It's an event you won't want to miss out on!
Click the image to go to the information page for details and to register. We'd love to see you in the Smokies!!
Until Next Time,
Happy Crafting!
#TheStampinChic
Happy Crafting!
#TheStampinChic
If you would like to purchase any of the supplies I used on today's project, simply click an image below to be taken directly to my website. Enjoy!


")
 Designer Series Paper")


