Showing posts with label Whimsy & Wonder. Show all posts

Monday, November 1, 2021

A Fun Pop-Up Whimsy & Wonder Gift Card Holder

Hello friends! It's time for another Make-It Monday!!!  I can't wait to share today's project with you. I think you're gonna love it!  

It's a beautiful card that carries a surprise inside! Open it up to find a pop up gift card holder!! YAY!!
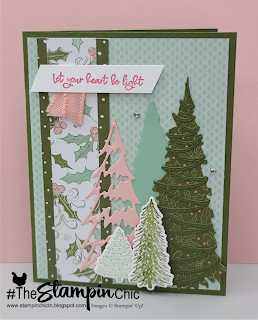

Even if you don't need or want a gift card holder inside, this is a beautiful Holiday card! Right?  I love all the layers and these absolutely GORGEOUS colors!
I could create all day, just using these colors with white. They're so beautiful!
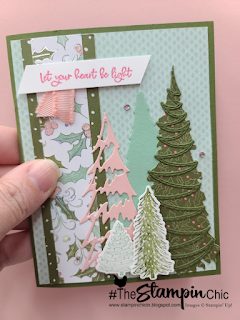

For this project you will need: 
* 8 1/2" x 5 1/2" Mossy Meadow Card Base (Scored at 4 1/4")
* 4" x 5 1/4" DSP Background layer #1
* 1 1/2" x 5 1/4" DSP Background layer #2
* 1" x 5 1/4" DSP Background layer #3
* 2" x 4 3/4" DSP for tall tree die cut
* 8 1/4" x 2 3/4" DSP for Gift Card Holder insert
* 2" x 3 3/4" Blushing Bride Cardstock for tree die cut
* 2" x 3 3/4" Mint Macaron Cardstock for tree die cut
* 2 1/2" x 2 1/2" Basic White Cardstock scrap for two small trees die cut
* 2 3/4" x 1/2" Basic White Cardstock strip for sentiment
* 4" x 5 1/4" Basic White Cardstock (cut 2) for inside layers (could also use DSP in place of one white)


To create the pop-up piece inside the card, follow the template here: 
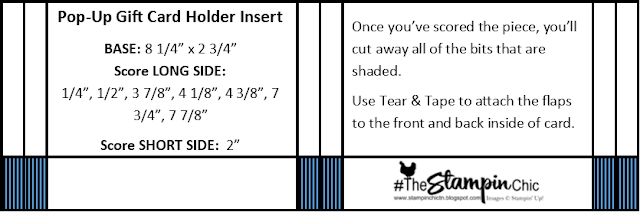

Once you attach the pop up piece to the inside panels of the card, you can add your inside layers over the top of the tabs. This will really secure the pop-up inside and give you a nice clean finished look.  

Watch my Make-It Monday Video to see how I assembled this beautiful card.  Please SUBSCRIBE to my YouTube Channel and give my video a THUMBS UP if you like it!  This helps more people see my videos! :-) 
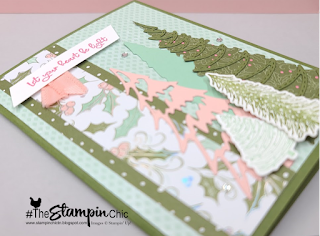

I hope you enjoyed today's project and can use it this holiday season!  Gift Cards are going to be the way to go I think.  And they're so versatile! 

Isn’t the Whimsy & Wonder Collection absolutely gorgeous? 
Join me for a Whimsy & Wonder CLASS TO GO!
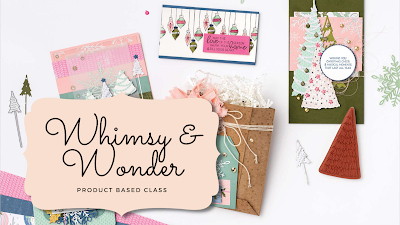
(click image to register for CLASS TO GO)

Cost of the class is $45 (plus priority shipping $16.25) and includes the following:

* Full package of Whimsy & Wonder Designer Series Paper
* Full package of Wonderful Snowflakes Die Cuts
* Spool of Blushing Bride Frayed Ribbon
* 8 stunning card kits! (2 each of 4 designs)

Registration ends Monday November 15th
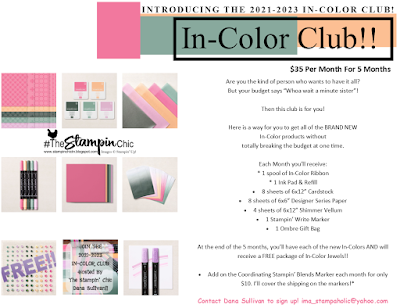
Do you just LOVE the new In-Colors and want to have them all?  Join my In-Color Club and get a fantastic selection of products featuring the new In-Colors, at a price that doesn't make your pocketbook scream! Now you CAN get all the things!! PLUS, get a set of the new In-Color Jewels
FOR FREE!!  To get all the details and to sign up, click the image below. :-) 


To receive the 2021-2022 Annual Catalog (Idea Book), click the image here to go to the request form!


Until Next Time,
Happy Crafting!
#TheStampinChic

If you would like to purchase any of the supplies I used on today's project, simply click an image below to be taken directly to my website. Enjoy!

Product List

Wednesday, October 27, 2021

Whimsy & Wonder CASE-IT Wednesday


Hello there friends! Today, I have not just one but TWO fabulous CASE-IT projects to share with you!  Well, that's because the Whimsy & Wonder product collection is just THAT beautiful!  

Page 24 of the July/December 2021 Holiday Catalog is where we're taking these gorgeous projects from.  You'll find not only super pretty projects, but the Whimsy & Wonder Suite which is absolutely STUNNING!

Project #1 is a card I've been wanting to CASE since I laid eyes on it this summer! SOOO PRETTY!!

Here are the measurements I used (which may or may not be exact or near exact of the card in the catalog): 

* 8 1/2" x 5 1/2" Blushing Bride Card Base (scored at 4 1/4")
* 4" x 5 1/4" Whimsy & Wonder Snowflake DSP
* 3 1/4" x 4 1/2" Vellum Cardstock
* 4 1/4" x 3/4" Strips:
        - (cut 2) DSP
        - (cut 1) Soft Succulent
        - (cut 1) Blushing Bride
        - (cut 1) Misty Moonlight
* 4" x 5 1/4" Basic White Cardstock for inside panel
* 1 3/4" x 3/4" Shimmer White Cardstock for sentiment
* 2 3/4" x 4 1/4" Shimmer White Cardstock for die cutting trees
* Scrap of Misty Moonlight for tree stars
* Scrap of Mint Macaron for tree garland
* 1 Wonderful Iridescent Snowflake
* Genial Gems
* Blushing Bride Frayed Ribbon
* Linen Thread

You'll also need a Polished Pink Ink pad and a DARK Mint Macaron Stampin' Blends Marker.  The Stampin' Blends Marker is needed to color the backside of the snowflake. Coloring the backside magically puts a lighter shade of the color through to the iridescent side! It's wild! 


You can see by looking at the pictures, that the card is actually pretty easy to assemble. Layer the Blushing Snowflake layer on the card front.  Attach the strips across that (nearer the top than the bottom). Add the Snowflake to the center. Strategically attach the Vellum to the top. Then add the die cut pieces and the sentiment.  

I will suggest that you stamp the "JOY" onto the shimmer paper first and set it aside. It'll need a few minutes to dry good and even then, I would be careful not to smudge it when adding it to the card. It will dry really nicely. It just takes a few minutes on that Shimmery Cardstock. :-) 


The next CASE-IT project is on the same page.  I have been looking at that adorable "bag"/pocket and wanting to CASE-IT for a while. I'm glad to finally be getting to it!  The completed bag is 5" x 5 1/2" and opens up wide enough to add some fairly flat items.  This would be a terrific Gift Card or money Holder!  It's also big enough to hold most of Stampin' Up embellishment sheets. It's wide enough to hold a card, but not quite tall enough to conceal it completely. 

You'll need: 
* 3 sheets of Kraft Paper (cut 1) 5" x 6" and score at 1" on the long side, (cut 2) 3 1/2" x 5" and score at 1/2" on the short side.
* 2 3/4" x 3 3/4" Soft Succulent Cardstock for Tag
* DSP to die cut tree, and fussy cut two gifts
* 1 Wonderful Iridescent Snowflake
* Blushing Bride Frayed Ribbon (this project takes a LOT of this ribbon. But it's totally worth it!)
* Essentials Baker's Twine


For this project, you'll also need Crumb Cake Ink to make the background pattern on the bag. I used the big dotted tree stamp from the Stamp Set to stamp all over all three panels, creating this fun speckled background. It really didn't take long. The stamp is big. :-) 

You can see how I create the card, bag, bow, and tag in my video: 


Please consider SUBSCRIBING to my channel while you're there and give the video a THUMBS UP if you like it! :-) 


I hope you enjoyed getting two CASE-IT projects today! I know it never happens that way, but I felt sure these needed to be shared together instead of individually. :-) 

Do you just LOVE the new In-Colors and want to have them all?  Join my In-Color Club and get a fantastic selection of products featuring the new In-Colors, at a price that doesn't make your pocketbook scream! Now you CAN get all the things!! PLUS, get a set of the new In-Color Jewels FOR FREE!!  To get all the details and to sign up, click the image below. :-) 


To receive the 2021-2022 Annual Catalog (Idea Book), click the image here to go to the request form!


Until Next Time,
Happy Crafting!
#TheStampinChic

If you would like to purchase any of the supplies I used on today's project, simply click an image below to be taken directly to my website. Enjoy!

Product List