

Hello there my crafty friends! How are you this evening? It's time for my most FAVORITE Blog Hop ever!! Time for the Paper Pumpkin Possibilities Blog Hop! yayayaya!!

We are a group of designers who love to create ALTERNATIVE projects with our Paper Pumpkin kits. That's not to say that the kit itself isn't amazing, because it is! But ya know, sometimes a theme just isn't quite for you. Our blog hop gives you a whole collection of incredible projects you can do in place of the standard kit. So cool right?
And if that isn't enough alternative inspiration for you, there's a whole collection of Alternative Tutorials that you can get your hands on from the Paper Pumpkin Creatives Crew! See the graphic at the end of my post. :-D
Shall we get this party started?
The May 2025 Paper Pumpkin theme is "Mountains Majesty", and it is PEFECT for my little East Tennessee homeland!
The May 2025 Paper Pumpkin theme is "Mountains Majesty", and it is PEFECT for my little East Tennessee homeland!

MAY: Mountain Majesties
Subscribe April 11–May 10
Create Father’s Day cards with layered mountain landscapes!
• Makes 9 cards: 3 each of 3 designs with 9 coordinating envelopes
• Precut vellum and paper pieces
• Watercolor card bases and coordinating envelopes
• Coordinating colors: Basic Black, Lost Lagoon, Misty Moonlight
(Classic Stampin’ Spot), Mossy Meadow, Pecan Pie, Petal Pink
Includes vellum pieces for layering and sentiments tailored to men!

And of course the Hugs Abloom Dies Add-On #166238 —available only while supplies last!

My card is an upright double Z-Fold Card. I really liked this fancy fold with the mountain theme because it gives a really nice depth and dimensional look. Similar to a mountain range.

If you've followed me for any bit of time, you know I'm big on saving paper. So, when I was pulling pieces of the kit out to make the layers, I knew I could cut a section of that Misty Moonlight Vellum off and save it for something else later. So that's what I did. It's approximately 2" off the bottom. From there, I adhered the top section of vellum to the back of the printed panel.

After I adhered the two pieces together, I grabbed the Misty Moonlight ink spot (that came in the kit) and stamped some of the birds across the mountain range. If you look at the photo where the card is opened up, you'll see that I stamped them across about half of the card base too. I wanted it to look like a whole flock of birds flying over the lake.
I used the little mountain printed layer and the little Misty Moonlight vellum piece to make the smaller section layers on the Z-strip. They were basically eyeballed in height, but their width was 2" each.

As you can see from the photo above; I added the die cut trees piece to the Vellum and printed panels with Stampin' Dimensionals, and then attached that directly to the wider Z-panel strip.

I used the little mountain printed layer and the little Misty Moonlight vellum piece to make the smaller section layers on the Z-strip. They were basically eyeballed in height, but their width was 2" each.

The sentiment was stamped in Misty Moonlight ink on a piece of Basic White Cardstock that had been die cut with the label from the coordinating Dies Add-On set. If you don't make a habit of ordering these dies each quarter, I really recommend that you do. They are a real asset when it comes to creating alternative projects! I just love them! Plus you can use them for so many other things as well! They're not limited to Paper Pumpkin projects.
That beautiful bow is a "SNEAK PEEK" of a ribbon that will be coming out in the 2025 Holiday Catalog. It's not yet available for purchase. All I can tell you about it is: "You'll want to order a few rolls of it the moment it DOES come available on September 3rd". I can bet that this one will go out of stock FAST. It is GORGEOUS!!!
I attached the label with Dimensionals and the bow with Mini Glue Dots.
As you can see, the final step to completing our card is to add a few of the Rhinestone Basic Gems! Sprinkle them around like confetti or like beautiful stars in the night sky!!
As you can see, the final step to completing our card is to add a few of the Rhinestone Basic Gems! Sprinkle them around like confetti or like beautiful stars in the night sky!!

HEY!!! DID YOU KNOW??
I'm part of an incredible tutorial group called Paper Pumpkin Creatives.
We produce a monthly tutorial bundle chock full of 12-14 STUNNING Paper Pumpkin Alternative Projects!!
From cards, to treat holders, to Scrapbook pages and more........ You can find a wealth of inspiration inside! Would you like to get your hands on it?
Click our image here to go to my ordering page!

Check out my upcoming classes (and classes TO GO), over on my
Facebook Calendar of Events. Registration details can be found under each class description. Join us for some crafty fun!

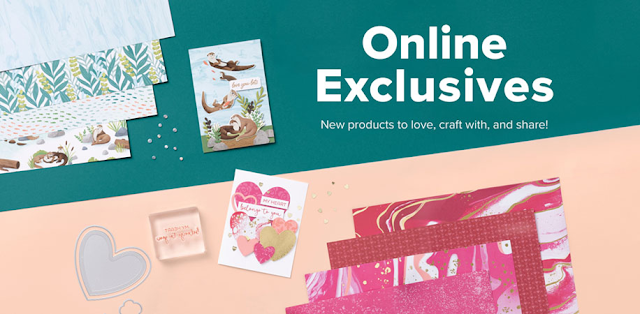
What you see in the catalog isn't all the amazing products Stampin' Up offers! Click the image below to be taken to our Online Exclusive collection. There's even more fun awaiting you there!
Until Next Time,
Happy Crafting!
#TheStampinChic
Happy Crafting!
#TheStampinChic
If you would like to purchase any of the supplies I used on today's project, simply click an image below to be taken directly to my website. Enjoy!


![Hugs Abloom Dies [ 166238 ]](https://assets1.tamsnetwork.com/images/EC042017NF/166238s.jpg "Hugs Abloom Dies [ 166238 ]")
![Basic Gray 8-1/2" X 11" Cardstock [ 121044 ]](https://assets1.tamsnetwork.com/images/EC042017NF/121044s.jpg "Basic Gray 8-1/2\" X 11\" Cardstock [ 121044 ]")
![Basic White 8 1/2" X 11" Cardstock [ 166780 ]](https://assets1.tamsnetwork.com/images/EC042017NF/166780s.jpg "Basic White 8 1/2\" X 11\" Cardstock [ 166780 ]")
![Misty Moonlight Classic Stampin' Pad [ 153118 ]](https://assets1.tamsnetwork.com/images/EC042017NF/153118s.jpg "Misty Moonlight Classic Stampin' Pad [ 153118 ]")

![Rhinestone Basic Jewels [ 144220 ]](https://assets1.tamsnetwork.com/images/EC042017NF/144220s.jpg "Rhinestone Basic Jewels [ 144220 ]")


