Good evening my crafty friends! Today is a great day!!! We're hopping with the ICS Design Team for a "MY FAVORITE PUNCH" themed hop.
It's also Day 6 of The 13 Days of Halloween Treats!! Welcome everyone to my annual Halloween Treat Holder series! Each weekday for 13 days, I bring a new Halloween Treat to you. I do a YouTube LIVE at 8pm eastern time and post the tutorials and videos here on my blog! We're not quite halfway through the days and will have them all done in plenty of time to recreate for your own little ghouls and boys!
It's also Day 6 of The 13 Days of Halloween Treats!! Welcome everyone to my annual Halloween Treat Holder series! Each weekday for 13 days, I bring a new Halloween Treat to you. I do a YouTube LIVE at 8pm eastern time and post the tutorials and videos here on my blog! We're not quite halfway through the days and will have them all done in plenty of time to recreate for your own little ghouls and boys!
To create this project, you'll need:
* Poppy Parade Cardstock: 3 1/2" x 7" (scored on the LONG SIDE at: 1/2", 3 3/4", & 4")
* Poppy Parade Cardstock: 3 1/2" x 7" (scored on the LONG SIDE at: 1/2", 3 3/4", & 4")
* Basic Black Cardstock: 3 3/8" x 2 7/8"
* Black & White Polka Dot DSP (from the Black and White Designer Series Paper): 3 1/4" x 2 3/4"
* Poppy Parade Cardstock: Die Cut with 3rd largest Scalloped Circle Die
* Basic White Cardstock: Die Cut with 4th largest Layering Circle Die
* Poppy Parade Cardstock: Die Cut with 3rd largest Scalloped Circle Die
* Basic White Cardstock: Die Cut with 4th largest Layering Circle Die
* Basic White Cardstock Scraps: to stamp & punch witch's hat and fussy cut feet, and spider
* 12" length of Black & White Gingham Ribbon
* Black Glitter Washi
After I colored the hat band, I stamped stars in Memento ink. I stamped the legs, colored them with Stampin' Blends and then fussy cut them out. It wasn't too bad and they look really cute! I used a little liquid glue to attach them to the back of the hat.
When stapling the little flap at the bottom, be sure to put the staple near the folded edge, not the open edge. You want a bit of room to tuck the front flap into it.
I applied some adhesive runner to the center of the front flap and attached the ribbon on. Then added the layered circles with Stampin' Dimensionals. After I had glued the legs and the spider to the witch's hat, I attached it to the circle with dimensionals as well.
To finish my project, I used Dark Basic Black Stampin' Blends marker to color a few Rhinestone Basic Jewels and add them to the front of the treat holder. They give it just a little bling!
I hope you like today's project! You can watch how I created it on my YouTube video here:
You can "SUBSCRIBE" and click the bell to be notified when I post new videos! And be sure to come back again tomorrow evening for Day 7 of The 13 Days of Halloween Treats!!
Don't forget to continue hopping along to see what the other designers' favorite punches are! Click the next button here to visit Ms Tricia's blog.
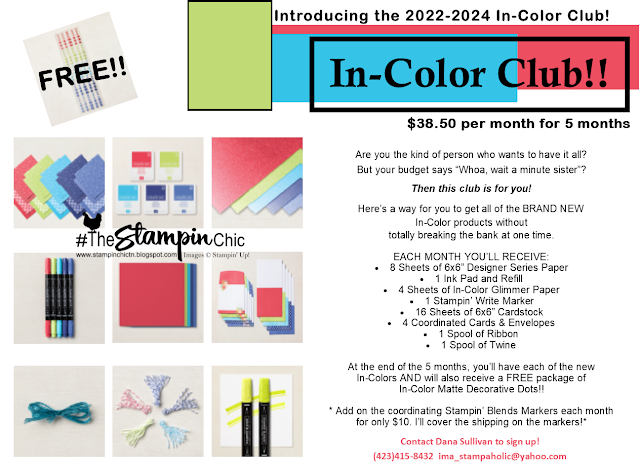
Have you seen the new GORGEOUS 2022-2024 In-Colors? Join my In-Color Club and get a fantastic selection of products featuring the new In-Colors, at a price that doesn't make your pocketbook scream! Now you CAN get all the things!! PLUS, get a set of the new In-Color Matte Dots FOR FREE!! To sign up, click the image below. :-)
To receive the upcoming 2022-2023 Annual Catalog (Idea Book),
click the image here to go to the request form!
Until Next Time,
Happy Crafting!
#TheStampinChic
Happy Crafting!
#TheStampinChic
If you would like to purchase any of the supplies I used on today's project, simply click an image below to be taken directly to my website. Enjoy!


Such vivid and fun colors with your punch project - very eye catching!
ReplyDeleteWhat a cute treat!!!! Love this punch!!!!
ReplyDeleteThat's adorable! I love your treat holders they are always so cute! Thanks for hoping with us!
ReplyDeleteSper cute treat holder!
ReplyDeleteI love this witch treat holder! Super cute!
ReplyDeleteYou always make such fun and creative treat holders! Love the bright colors!
ReplyDelete