Are you team "Fall Y'all" or team "Spooktacular Halloween"?? The Stampers Showcase Designers have created a project with one of those themes to share with you today. Since I just wrapped up the 13 Days of Halloween Treats, I'm still kinda coming down from a Halloween High. lol. So, I figured I'd just roll with it.
I really like how the project turned out and LOVE the fun techniques used to create it!
Here are the measurements for your paper goods:
* 8 1/2" x 5 1/2" THICK Basic White Card Base (scored at 4 1/4")
* 4" x 5 1/4" Basic Black Cardstock (die cut with largest Scalloped Contours Die)
* 3 1/4" x 4 1/2" Basic White Cardstock (die cut with 3rd Largest Stitched Rectangles Die)
* Scrap of Black Glitter Paper (to die cut Spider Web. Can use regular Basic Black.)
* 3" x 3/4" Houses DSP Strip
* 2 7/8" x 3/4" Boo DSP Strip
* 2 5/8" x 5/8" Polka Dots DSP Strip
You'll also want approx. 8" of the Black & White Twine from the Playful Pets Trim Combo Pack.
I layered the Black scalloped frame and the checkered rectangle directly to the card base.
The strips of DSP were all cut and one end dovetailed. They were assembled together and then adhered directly to the card. I used a large black Stampin' Dimensional to attach the Spider Web to the card.
For the sentiment, I used another favorite technique. Did you know that you can emboss in ANY of Stampin' Up's colors? It's true! Simply ink your sentiment/image in Versamark ink first, then the color, then stamp on the paper. Next, use CLEAR Emboss powder over the sentiment/image and then heat it up. That's it! easy peezy and lots of fun! Just remember, it's Versamark THEN Color! I love the shine of the embossed black ink, especially on this Halloween themed card!
All there is left, is to attach the bow with a glue dot and then add a few Matte Black Dots! You have yourself a super cute, super sweet, spooktacular card to give to someone special!
I hope you enjoyed my fun Halloween card. And, I hope you'll try out the techniques we used today! Explore and Discover the possibilities with your products. You may find some fun new thing.
Be sure to hop all the way around so you don't miss any of the fantastic projects shared with you today!! Click the "NEXT" Button here to head over to my sweet friend Ange's blog.
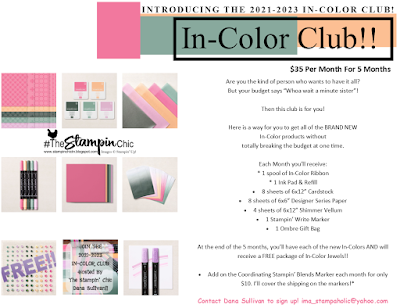
Do you just LOVE the new In-Colors and want to have them all? Join my In-Color Club and get a fantastic selection of products featuring the new In-Colors, at a price that doesn't make your pocketbook scream! Now you CAN get all the things!! PLUS, get a set of the new In-Color Jewels FOR FREE!! To get all the details and to sign up, click the image below. :-)
To receive the 2021-2022 Annual Catalog (Idea Book), click the image here to go to the request form!
Until Next Time,
Happy Crafting!
#TheStampinChic
Happy Crafting!
#TheStampinChic
If you would like to purchase any of the supplies I used on today's project, simply click an image below to be taken directly to my website. Enjoy!


Great card Dana, loving the background dsp which I have totally missed! x
ReplyDeleteCute card Dana! Love your checkered background.
ReplyDeleteI love your card, and yes that lovely cluster caught my eye. I love details like that!
ReplyDeleteGreat use of the inking an embossing folder technique. I also like the cluster of patterns of paper at the base card. Lx
ReplyDeleteCute card thanks for organizing another great hop!
ReplyDelete