Heya friends! Are you ready for another fabulous Halloween treat? This one holds one of the lil Miss's favorite treats..... Kit Kat Bars! But, this little holder holds those bite sized treats that come in a bag.
Welcome to Day 3 of the 13 Days of Halloween Treats!
For today's treat holder, I started with a 4 1/4" x 4 1/4" piece of Basic Black Cardstock. I scored the 5/8" score lines first, by aligning the top and bottom points at the 5/8" mark to the LEFT of the cut track/guide. Then, I flipped the piece completely around to score the 2nd long line with the points once again lined up at 5/8" on the LEFT of the cut track/guide. This created the two long parallel lines.
Then, I turned the piece so that the "TOP" point was pointed to the LEFT at 1 1/2". I scored that short line, then turned the piece completely around and scored the other end the same way.
On the side panel that tucks in, cut a bit of the tip off so it makes a flat edge to tuck in. This will remove unnecessary bulk right there. Wrap the other panel over top and then trim the tip so that the edge of the panel is flush with the bottom edge of the holder. You don't "HAVE" to do this step. You could just wrap the tip on around to the bottom of the holder. But I feel that it gives a nicer more finished look.
The tree is die cut from Basic Black Cardstock. The owl is cut from Soft Suede Cardstock and his eyes are cut from a 1/2" x 3/8" piece of Crushed Curry Cardstock. The moon is stamped on Basic White Cardstock, in Bumblebee Ink that I've stamped off one time to soften it up, then the sentiment is stamped in Memento Black.
I used approx 13" of the super cute Black & White Gingham Ribbon to tie around the little holder into a bow. Once I had the ribbon tied, I attached all the stamped & die cut pieces. Then, I finished up my holder with a few holographic adhesive backed star sequins. Aren't they the cutest? LOVE!
You can see it here as well, if you like:
I hope you enjoyed today's little treat holder! I really, REALLY like this one! SO CUTE!!
Registration is open NOW for the upcoming Beautiful Tomorrow Blue Ridge Stampin' Escape with me and my friend Wendy! Join us for a fun and exciting Stamping Experience full of amazing products and gorgeous projects! Get all the details and register by clicking the image here:
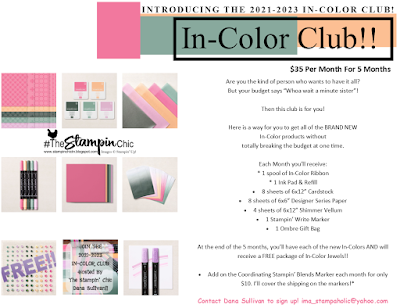
Do you just LOVE the new In-Colors and want to have them all? Join my In-Color Club and get a fantastic selection of products featuring the new In-Colors, at a price that doesn't make your pocketbook scream! Now you CAN get all the things!! PLUS, get a set of the new In-Color Jewels FOR FREE!! To get all the details and to sign up, click the image below. :-)
To receive the 2021-2022 Annual Catalog (Idea Book), click the image here to go to the request form!
Until Next Time,
Happy Crafting!
#TheStampinChic
Happy Crafting!
#TheStampinChic
If you would like to purchase any of the supplies I used on today's project, simply click an image below to be taken directly to my website. Enjoy!


No comments:
Post a Comment