
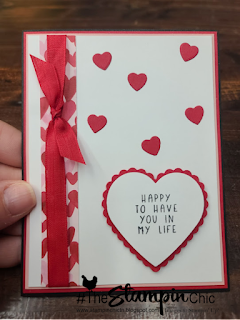
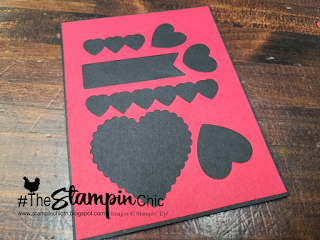
One of my favorite ways to save paper is to punch and die cut from background layers before I add them to a card. Once you've covered them up with a forward layer, no one is the wiser! It's a fantastic way to REDUCE the amount of paper we use!

This was all cut from a 4 1/8" x 5 3/8" piece of Real Red Cardstock.
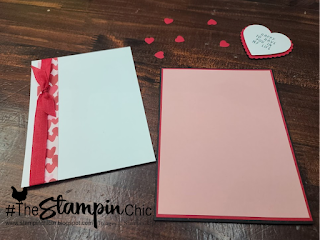
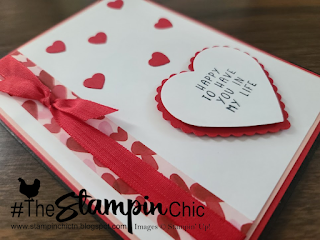
As you can see here, once I add the 4" x 5 1/4" Blushing Bride layer on, It completely covers all the die cut and punched spaces.
Before I attached the 3 7/8" x 5 1/8" Basic White layer, I added a 3/4" x 5 1/8" strip of Designer Series Paper, and then tied approx 13" of the Real Red Faux Linen Ribbon around into a knot.
Remember, two layers of dimension on a card is about the most you wanna add if you're going to be mailing a card. At least without adding extra postage. ;-)
Scroll down the page to find my supply list. You've got time to get them ordered and received, created, and sent before Valentine's Day! :-D
Join Me & Wendy Lee as we go "OVER THE RAINBOW" in our next Blue Ridge Stampin' Escape! 12 Gorgeous exclusive projects, PLUS amazing Stampin' Up product, AND tons of fun and prizes! Click the image to get all the details and to register for the event!

Do you just LOVE the new In-Colors and want to have them all? Join my In-Color Club and get a fantastic selection of products featuring the new In-Colors, at a price that doesn't make your pocketbook scream! Now you CAN get all the things!! PLUS, get a set of the new In-Color Jewels FOR FREE!! To get all the details and to sign up, click the image below. :-)

To receive the 2021-2022 Annual Catalog (Idea Book), click the image here to go to the request form!

Until Next Time,
Happy Crafting!
#TheStampinChic
Happy Crafting!
#TheStampinChic
If you would like to purchase any of the supplies I used on today's project, simply click an image below to be taken directly to my website. Enjoy!
")

 Designer Series Paper")


 Faux Linen Ribbon")


Brilliant! I love doing this because nobody is any the wiser!
ReplyDeleteBeautiful Card, and a super frugal way with your card. I really must try to do this!!
ReplyDeleteThis is a cute card, great way to reduce waste of cardstock, I should do this more often, thanks for the reminder!
ReplyDeleteI do this too! A woman after my own heart :)
ReplyDeleteGreat idea, I always do this as well :-)
ReplyDeleteI am so glad that I am not the only cheap one around! I do it with scrapbooks also! Pretty card and great tips!
ReplyDeleteBrilliant idea 💡 👏
ReplyDelete