Friday, January 27, 2023

Paper Pumpkin Blog Hop - January 2023


Good morning my crafty friends!!! Are you ready for some Paper Pumpkin Alternative LOOOOOOOVE??  Today, the Crafty Collaborations Crew are bringing you some fabulous alternative projects to do with your "Key To My Heart" January 2023 Paper Pumpkin kit.  YAYAYA!!


The January kit creates nine absolutely ADORABLE Valentine/Love themed cards.  The stamp set is just fabulous and the die cut images are spectacular!


The kit came with Fresh Freesia ink and featured that with Calypso Coral and Petal Pink.  But I went a different route with my alternative card.  Once the kit is all used up, you're left with a fun stamp set that will last forever.  I wanted to use just the stamp set for my card. 


I brought in a few other elements from Stampin' Up's 2022-2023 Annual Catalog to make my card beautiful.  The base of the card is Polished Pink Cardstock (4 1/4" x 11", scored at 5 1/2").  For the first layer, I wanted to add a patterned paper so that my card wouldn't be so stark.  I found this beautiful pink print in the "Awash In Beauty 12x12" Designer Series Paper". So I layered a 4 1/8" x 5 3/8" piece onto the card front. 
From there, I added the largest of the Scalloped Contours Dies cut from Basic White Cardstock. After stamping "To My Valentine" in Memento ink, I popped it onto the card with Stampin' Dimensionals.  I also brought in the double heart punch pack to make two each of the layered hearts. The scalloped layer is in Polished Pink, and the front layer is Basic White.  I layered the hearts together and then offset the two as you see pictured here. Then, attached them to the card front with Dimensionals. 


You've heard me say it time and time again....... "No Naked Insides, And No Naked Envelopes".  Clearly, this is my mantra. lol. For the inside panel, (4" x 5 1/4" Basic White) I stamped my sentiment in Memento Ink, and then stamped the heart lock and key in Polished Pink. I coordinated the envelope by stamping the same lock and key on the front, and using some of the same Designer Series Paper for the flap. There's no mistaking that this envelope goes with this card! I love it!


Once I put the inside panel in my card, I went to work finishing the card front.  I stamped the lock and two keys in Polished Pink ink and fussy cut them out. I used Mini Glue Dots to attach the three pieces together. This gives the look of dimension without the bulk of a dimensional.  But I did attach the whole lock to the heart with Dimensionals. 

After I finished all that, I added a little bling! Three of the little Basic Rhinestones was a perfect compliment to my card. 


Paper Pumpkin shared some alternatives of their own on the backside of the kit's instruction sheet.  Did you see them?  You can find all the details (and the instructions for them) over on Paper Pumpkin's Blog!  Just click the image below to visit their page. 


Be sure to follow the blog hop below, and visit all the blogs listed to see a wonderful variety of alternative projects! Enjoy!


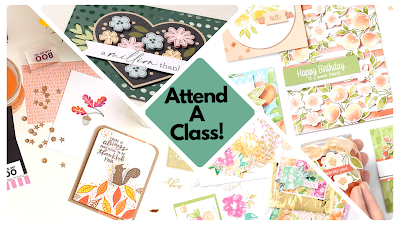
Check out my upcoming classes (and classes TO GO), over on my
Facebook Calendar of Events. Registration details can be found under each class description.  Join us for some crafty fun!


To receive the 2023 Spring Mini Catalog (Idea Book),
click the image here to go to the request form!


Until Next Time,
Happy Crafting!
#TheStampinChic

If you would like to purchase any of the supplies I used on today's project, simply click an image below to be taken directly to my website. Enjoy!

Product List

2 comments:

  1. What a cute idea using the stamps from the Key To My Heart kit. Beautiful card.

    ReplyDelete
  2. I like how you used the punches with the set!

    ReplyDelete