Good morning friends! I hope you're having a super fabulous Friday so far! Today, the Crafty Collaborations Crew are doing their monthly Paper Pumpkin Blog Hop.
As is, it makes 3 each of 3 designs for a total of 9 absolutely adorable cards!
Plus, I found lots of goodies left over to make alternatives with! Which is always great!
I started out with a Thick Basic White card base (4 1/4" x 11", scored at 5 1/2"). I used the 2nd largest Scalloped Contours Die to cut the Fresh Freesia background from one of the included card bases. It's so pretty, isn't it?
I just love being able to make other things from the included kit supplies! hehe.
If you look in your kit, you'll recognize the Pear Pizzazz piece! it's the negative space that some of the die cut labels were in. I just trimmed all the white off around it. It's amazing what you can use for project elements when you think outside the box! Once I had that piece cut out, I cut a piece of Basic White Cardstock to fit behind it. Then, I laid the two pieces together to give me an outline and stamped the Happy, Happy, Happy, Birthday in the spaces. By the way, I cut that stamp apart before I started.... making it Waaaaaay easier to stamp. It's A-OK to cut your stamps apart! And, when I want to stamp Happy Birthday as one sentiment again, I can easily line them up along the cut mark to have them back together again. SMART, huh? ;-) Once I had the stamping done, I used Foam Adhesive Strips between the Pear Pizzazz frame and the Basic White Layer. This created a shadowbox type look.
The banner "YAY" was stamped directly onto the otter, and then again on Basic White Cardstock. Then, I cut each of the pennants out and stuck them (with dimensionals) onto their appropriate spots on the otter. This made the banner look 3d!
On the inside of the card, I stamped "Let's Celebrate" and then added another fussy cut otter to the bottom corner.
I really like this card and I think someone else will love it for their birthday!
I really like this card and I think someone else will love it for their birthday!
I hope you enjoyed it too!!
Make sure you visit all the blogs listed below to get lots of fun Paper Pumpkin Alternative ideas!!
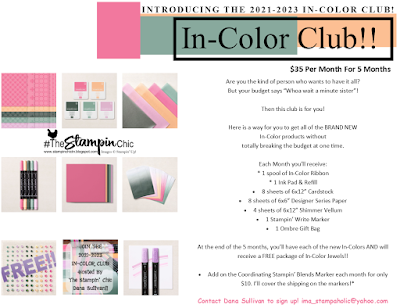
Do you just LOVE the new In-Colors and want to have them all? Join my In-Color Club and get a fantastic selection of products featuring the new In-Colors, at a price that doesn't make your pocketbook scream! Now you CAN get all the things!! PLUS, get a set of the new In-Color Jewels FOR FREE!! To get all the details and to sign up, click the image below. :-)
To receive the 2021-2022 Annual Catalog (Idea Book), click the image here to go to the request form!
Until Next Time,
Happy Crafting!
#TheStampinChic
Happy Crafting!
#TheStampinChic
If you would like to purchase any of the supplies I used on today's project, simply click an image below to be taken directly to my website. Enjoy!


Love how you used the negative piece for your stamping! Great idea!
ReplyDeleteI love everything about this. The way you used the negative space is genius. And that otter is adorable. Well done!
ReplyDeleteWow--love your use of the PP yay banner with the otter! Super creative and fun!
ReplyDelete