Monday, August 1, 2022

Sweet Cherries Double Z-Fold Card Make-It Monday


Good evening my fabulous Stampin' Friends! How are you today?  I've got a very pretty, and super fun card to share with you today!! It's a Double Z-Fold Fancy Fold Card!

What you'll need: 

-Poppy Parade Cardstock (Card base):
11" x 4 1/4" (scored at 2 3/4" and 5 1/2")
11" x 1 1/2" (scored at 2 3/4" and 5 1/2")

-Pacific Point Cardstock (Layer #1): 
5 3/8" x 4 1/8"
2 5/8" x 4 1/8" (cut 2)
5 3/8" x 1 3/8"
2 5/8" x 1 3/8" (cut 2)

- Basic White Cardstock (Top layer): 
5 1/4" x 4" (cut 2)
2 1/2" x 4" (cut 2)
5 1/4" x 1 1/2" 
2 1/2" x 1 1/4" (cut 2)
7" x 2 1/2" (scrap to cut 3 cherries)
3 1/8" x 1 1/4" 

I know it looks like a lot of pieces, but it's actually just a very simple (but beautiful) Fancy Fold Card that you're gonna love!

First things first: Attach all the Pacific Point layers to their coordinating Poppy Parade sections on the card base. 

Next, take the little white strips that coordinate with the Poppy Parade Card Strip and stamp them in Pacific Point ink using the little wicker basket stamp. Just like you see here. Once they're stamped, they can be attached to their coordinating areas. 


On the big 7" long scrap of Basic White Cardstock, we need to stamp and punch three sets of cherries. I stamped the cherries themselves in Poppy Parade ink and the stems and leaves in Garden Green. 


 If you create a template first (like shown here) you can stamp all your parts at once and punch them in one go. It saves a lot of time and paper!


While you have the cherry stamps out, go ahead and stamp a background on the three Basic White pieces that go on the card base. Once they're stamped, you can attach them to their respective places.  


I like to use Tear & Tape on each of the two ends of the long strip, to attach to the card nice and firm. I don't want that strip to pop off the card! 

On the 3 1/8" scrap of Basic White Cardstock, I stamped the word "SWEET" and fussy cut it out.  I attached it to the card front with Stampin' Dimensionals. 

The cherries were assembled on top of the basket weave stamped strip. The middle one is popped up with dimensionals and I've attached a dimensional behind the area where the leaves are attached too. 


I added a few Rhinestone Basic Jewels to add the finishing touches to this card. I really like how it turned out! To make a place for writing a sweet note, I used the remaining 5 1/4" x 4" Basic White piece and stamped a cherry (with stem) onto it. This piece is attached to the backside of the card. It's a perfect place to write a loving note to your recipient!


I hope you enjoyed today's card project! I really enjoyed sharing it with you! If you'd like to watch a video on how I made it, you can grab  your supplies and follow along by clicking here: 


Please consider subscribing to my channel if you haven't already! And I'd love for you to SHARE it with your friends too! :-D 


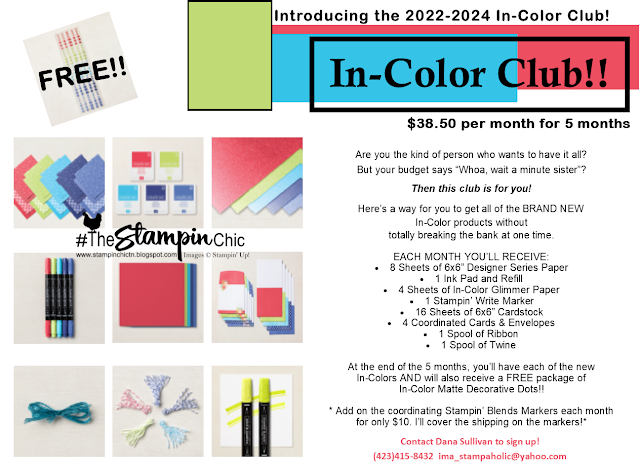
Have you seen the new GORGEOUS 2022-2024 In-Colors?  Join my In-Color Club and get a fantastic selection of products featuring the new In-Colors, at a price that doesn't make your pocketbook scream! Now you CAN get all the things!! PLUS, get a set of the new In-Color Matte Dots FOR FREE!!  To sign up, click the image below. :-) 

To receive the upcoming 2022-2023 Annual Catalog (Idea Book),
click the image here to go to the request form!


Until Next Time,
Happy Crafting!
#TheStampinChic

If you would like to purchase any of the supplies I used on today's project, simply click an image below to be taken directly to my website. Enjoy!

Product List

Friday, July 29, 2022

Christmas Greetings Glamper Card


Good morning friends! I have a super sweet and contemporary Christmas Card to share with you today.  I am totally and completely IN LOVE with these colors for Christmas! Blushing Bride, Mint Macaron, and White. SOOOO PRETTY!!! 

The fall Sale-a-Bration Brochure has an adorable set of dies (FOR FREE!!!!) that coordinate with a stamp set in the Holiday 2022 Catalog.  The Tree Lot Dies are so cute and I just can't even with that simply adorable camper die!! LOVE LOVE LOVE it!!  The dies coordinate with the Trees for Sale Stamp Set.  Together, they make the cutest and sweetest cards ever! 

For this card, I used a lot of the dies, as you can see here. The dies themselves are so incredibly versatile! You could make a campground scene or a birthday camper scene, or literally anything. Terrific!


Take note of the beautiful background here.  To achieve this look, you need to use a blending brush (or sponge dauber if you prefer) to apply Blushing Bride ink to the middle area of a 5 1/4" x 4" piece of Basic White Cardstock.  Then, Run it through the Stampin' Cut & Emboss Machine with the Whimsical Woodland 3D Embossing Folder.  It's just beautiful isn't it? 


This was one of the cards in my most recent Christmas Card Class.  I had a great turnout of folks who are apparently just as ready as I am to get out of this blazin' hot weather! LOL. 


I hope you enjoyed this sweet card! I'm still not ready to start flooding my feed with Christmas cards, but I just had to share this one with you. And there may be another here or there as the weeks move on.  Bare with me. I'm trying to "WILL" the cooler crisper fall air into existence! hehe. Have a super fantastic day my friends!!! 


Have you seen the new GORGEOUS 2022-2024 In-Colors?  Join my In-Color Club and get a fantastic selection of products featuring the new In-Colors, at a price that doesn't make your pocketbook scream! Now you CAN get all the things!! PLUS, get a set of the new In-Color Matte Dots FOR FREE!!  To sign up, click the image below. :-) 


To receive the upcoming 2022-2023 Annual Catalog (Idea Book),
click the image here to go to the request form!


Until Next Time,
Happy Crafting!
#TheStampinChic

If you would like to purchase any of the supplies I used on today's project, simply click an image below to be taken directly to my website. Enjoy!

Product List