


From the kit: I used a blue card base, one of the deckled and embossed layers with the punch out circle space, a vellum label, one of the bigger white labels, a couple of the die cut daisies, and a white envelope that's shown with the window card. It has the honeycomb and bees on the flap.

First thing I did was grab a scrap of Window Sheet big enough to cover the hole from the deckled layer. It's approximately 3 1/8" x 3 1/8". I glued it directly to the backside of the panel for my shaker.
I like to use adhesive foam strips for my shakers because I like the good closed up window space and the strips are a bit higher profile than Stampin' Dimensionals. They're really good for shakers and if you don't have them in your stash, I highly recommend! Not only do I bend a strip all the way around the outer edge of the window, but I also use the same strips to go around the whole panel and a strip or two in the spaces between the window and the edge to keep the layer from sagging on my card.
You can see from the photo here, that I fussy cut the printed bits off of the envelope. I was pretty impressed with the idea of using these bits to dress up the card with! HA! It's really fun when you think outside the box and the idea actually works!

The two honeycomb flap sections were glued directly to the front of the card base (being sure that they would show through the window how I wanted them to).
The daisy piece I added to the deckled window layer, slightly overlapping the window area.
I wanted to soften the edges up a bit so I used a little Crushed Curry ink and a blending brush to add a light amount of color around the deckled layer and the card front.
Once I had that done, I dumped a bit of the Champagne Iridescent Gems onto the middle of the "window space" on the card base. Before pulling the foam strip backing off the deckled layer, I held it over the card to confirm that it was how I wanted it. Then, pull the backing and stick it directly onto the card base. The foam strips are REALLY good adhesive, so you won't have much time to adjust if you don't get it aligned right.

Now that I have my shaker element in place, I could finish up the card front.
"Sweetest Birthday Wishes" stamped in Lost Lagoon Ink (included in the kit) and a bit of Crushed Curry inked around the edges of the white label, was perfect! I added Stampin' Dimensionals to the backside of the label and stuck it to the Vellum deckled strip. Then, I attached this whole piece to the card front near the bottom.
"Sweetest Birthday Wishes" stamped in Lost Lagoon Ink (included in the kit) and a bit of Crushed Curry inked around the edges of the white label, was perfect! I added Stampin' Dimensionals to the backside of the label and stuck it to the Vellum deckled strip. Then, I attached this whole piece to the card front near the bottom.
I used Stampin' Dimensionals to attach the two bigger Daisies to the card. The little half daisy was attached with just a touch of Tombow as was the few Champagne gems.
My card needed just a little something, so I decided to add a Linen bow above the daisies on the right. Then, to finish it all up, I brought in some Wink of Stella. You know that sparkle just makes it all nice!
I really hope you like my shaker card. I think the Champagne gems look like little bits of beeswax so I thought they made the perfect little shaker bits. :-)

If you just can't get enough of this kit, you can visit my online shop to see if there are any refills left available. As of the moment I'm typing this, they're still available, but who knows when they'll sell out. You can click the Daisy Daydream image here to go directly to the item page!

There's lots of fun elements in a refill for you to play with!


Well, friends, that's all for me.

Be sure to visit the other blogs listed here to find even more Paper Pumpkin Alternative Inspiration!
HEY!!! DID YOU KNOW??
I'm part of an incredible tutorial group called Paper Pumpkin Creatives.
We produce a monthly tutorial bundle chock full of 12-14 STUNNING Paper Pumpkin Alternative Projects!!
From cards, to treat holders, to Scrapbook pages and more........ You can find a wealth of inspiration inside! Would you like to get your hands on it?
Click our image here to go to my ordering page!

Check out my upcoming classes (and classes TO GO), over on my
Facebook Calendar of Events. Registration details can be found under each class description. Join us for some crafty fun!

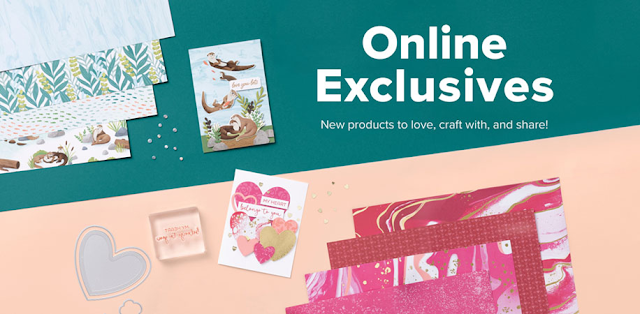
What you see in the catalog isn't all the amazing products Stampin' Up offers! Click the image below to be taken to our Online Exclusive collection. There's even more fun awaiting you there!
Until Next Time,
Happy Crafting!
#TheStampinChic
Happy Crafting!
#TheStampinChic
If you would like to purchase any of the supplies I used on today's project, simply click an image below to be taken directly to my website. Enjoy!


Love this - great shaker card - very clever!
ReplyDeleteI LOVE your shaker card, this is a stellar idea!
ReplyDeleteSuper cute shaker card!
ReplyDeleteWhat a great idea to create a shaker card with that card front! I love it!
ReplyDeleteA Shaker Card!!! Perfect idea for this month's kit! Love your card soooo much!
ReplyDeleteI love shaker cards! Thanks for sharing!
ReplyDeleteA great shaker card as an alternate. Thanks for your recipe!
ReplyDeleteExcellent shaker!
ReplyDeleteAbsolutely gorgeous!
ReplyDeleteVery pretty!
ReplyDelete