

Good evening my friends! I'm always happy to share a fun Paper Pumpkin Alternative project with you! Today, the Paper Pumpkin Possibilities Design Team are sharing projects using the November kit "Gifts Galore".

This kit included all the supplies needed to create NINE fabulous gift/treat holders. Just look at these guys! Aren't they adorable? 
One of the exciting things about the Paper Pumpkin kits, is that you can either create the whole kit as instructed, OR you can get creative and use the supplies to create something else. This is why Paper Pumpkin is perfect for all levels of crafter. There are so many different possibilities!The card I'm sharing this evening is one I created after the SAMPLER I posted on Saturday. Did you see it? You can check it out HERE if you missed that post.
When I'm creating my alternative projects, I like to step back away from the way the kit was designed. I focus a bit on the stamps themselves and see what I can create with them, aside from the kit. I want to find lots of ways to use the stamps because they are re-usable over and over, long after the kit's consumable supplies are gone.
 The cool striped "package" stamp in the set was perfect to create this fun coordinated background. And, while it took a few minutes lining up each stamping and changing colors each time, it was a lot of fun to make! As you can see, I alternated between the kit's coordinating colors: Pool Party, Old Olive, Evening Evergreen, Flirty Flamingo, and Poppy Parade. These colors are so much fun together!
Once I created the background, I trimmed it down just a bit. The card base is an 8 1/2" x 5 1/2" Pool Party Cardstock (scored at 4 1/4"). Then It's got a 4" x 5 1/4" Poppy Parade layer. And finally a 3 7/8" x 5 1/8" stamped background layer.
After I got the layers onto the card base, I took one of the super cute Snowmen from the kit and laid it where I wanted on the card. I attached it with Dimensionals and offset it from the front layers just a touch. I think it added some aesthetics to the card.
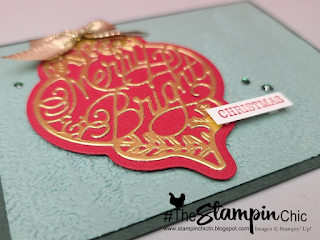
 Ya know, sometimes I find that I need to cut a stamp apart to make it easier for me to use the way I want to. It's ok to do that. Really! If you make a clean cut, you can easily lay the two pieces back together if you want to stamp them as one again later. I promise. It's A-Ok and easy to do. In this case, I separated the Merry Christmas. I stamped Merry on a scrap strip of Basic White Cardstock (in Poppy Parade ink) and fussy cut tight around it. I stamped Christmas (in Poppy Parade also) on another strip of Basic White Cardstock and then matted it onto a piece of Evening Evergreen cardstock to coordinate with the card, but still give it some separation from the background.

I think it turned out really cute and I'm in love with the snowman! I hope you've enjoyed my alternative project today. :-)
Click the "NEXT" button to head over to Judi's blog and see what wonderful alternatives await you!

After I got the layers onto the card base, I took one of the super cute Snowmen from the kit and laid it where I wanted on the card. I attached it with Dimensionals and offset it from the front layers just a touch. I think it added some aesthetics to the card.
Would you like to get your hands on a BRAND NEW Stamp Set that's not even available for Demonstrator Pre-Order yet? Click the image to place a $50 order using the required HOST CODE. For every $50 ordered, you'll get an entry to win!


Happy Crafting!
#TheStampinChic


 Shimmer Ribbon")

