Happy Monday my crafty friends! How are you today? It's time for another Make-It Monday! This week's Make-It Monday was inspired by the card I shared with you on Saturday. It was one I received in the mail from one of my team members. SO CUTE!! Be sure to go back and check it out HERE!!
I realized that I had not yet even put ink to that stamp set! WHAT?!! Unacceptable!! So, I got out my ink and paper and went to work.
You can find the Delicate Dahlias stamp set in the new 2nd Sale-A-Bration brochure. YES my friends!! It's FREE with a qualifying purchase!!! YAYAYAYAYAYAYAYAYA! That makes it even more awesome, right?!
The rich Blackberry Bliss from Kim's card was so beautiful, that I had to begin there. I chose an 8 1/2" x 5 1/2" (scored at 4 1/4") Blackberry Bliss card base like her, but turned it up to the portrait layout instead of landscape.
The rich Blackberry Bliss from Kim's card was so beautiful, that I had to begin there. I chose an 8 1/2" x 5 1/2" (scored at 4 1/4") Blackberry Bliss card base like her, but turned it up to the portrait layout instead of landscape.
One of my favorite things to do, is to create my own custom Designer Series Paper using stamps from a set. In this case, I was able to create a very soft and beautiful DSP by stamping the leaf cluster in Mossy Meadow all around a 2" x 5 3/8" piece of Very Vanilla cardstock. I also chose to emboss the 3" x 5 3/8" piece of Kraft cardstock with the Checks & Dots embossing folder to give it texture. It never ceases to amaze me how much a bit of embossing changes the look of a paper. It's wonderful!
Because my front layer is actually two different papers lined up to fill the space, I utilized my paper trimmer to give me the exact width I needed. I lined up the left edge of the stamped paper at the 4 1/8" mark on the trimmer, hen lined up the right edge of the Kraft paper at the cut track, and adhered them together where they over lapped. Then, I tied a length of the beautiful Diamond Weave Ribbon around the two and into a bow on the left side. Once the bow was tied, I adhered the entire piece to the card front.
The sentiment strip is a 2 1/4" x 1/2" strip of Very Vanilla cardstock that I stamped with Blackberry Bliss ink. I dovetailed the left end, and then matted it to a 2 3/8" x 5/8" piece of Blackberry Bliss. I found that it's easier to make a dovetailed mat, if the layers are already together. So, I did that after I adhered the layers. Then I attached the sentiment piece to the card with Dimensionals.
I stamped a leaf cluster in Mossy Meadow ink, on the upper right corner of a 4" x 5 1/4" piece of Very Vanilla cardstock for the inside layer. And, I also stamped the cluster (as well as a Blackberry Bliss Dahlia) on the envelope to coordinate!
**Remember "NO naked insides, and NO naked envelopes"!**
**Remember "NO naked insides, and NO naked envelopes"!**
My final step was to add a few of the subtle Mat Decorative Dots to the card. I think it finishes things off nicely. :-)
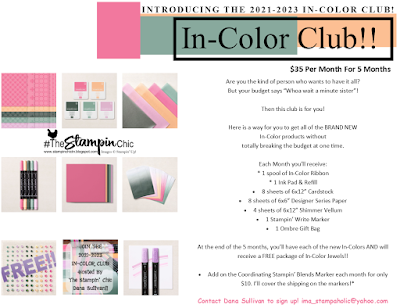
Do you just LOVE the new In-Colors and want to have them all? Join my In-Color Club and get a fantastic selection of products featuring the new In-Colors, at a price that doesn't make your pocketbook scream! Now you CAN get all the things!! PLUS, get a set of the new In-Color Jewels FOR FREE!! To get all the details and to sign up, click the image below. :-)
To receive the 2021-2022 Annual Catalog (Idea Book), click the image here to go to the request form!
Until Next Time,
Happy Crafting!
#TheStampinChic
Happy Crafting!
#TheStampinChic
If you would like to purchase any of the supplies I used on today's project, simply click an image below to be taken directly to my website. Enjoy!


No comments:
Post a Comment