Good evening my friends. We've reached the end of our annual 12 Days of Christmas Tags series. I want to THANK you all for visiting each day! It means alot to me, that you enjoy the projects I share with you. I hope you're able to use some (or all) of the designs for your own holiday tags this year.
I also borrowed the big tag die from the Stockings die set to cut a piece of Basic Black Cardstock. This will be the base of our tag.
You'll also notice a 3" x 1/2" piece of Real Red Cardstock that's been dovetailed on one end.
The Real Red Ribbon is just strung through a handheld hole punched in the end of the tag. It's approximately 6" long. Then, I tied a 10" length of the Black & White Striped Baker's Twine into a bow around the ribbon. It's a nice finishing touch. Super cute! Don't you think?
How about a quick recap, shall we?
Day 11
Day 10
Day 9
Day 8
Day 7
Day 6
Day 5
Day 4
Day 3
Day 2
Day 1
Thank you so very much for being a part of my fabulous community! I love having each and every one of you here with me!
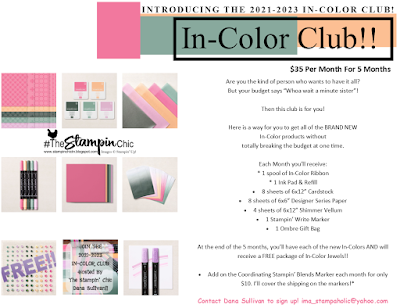
Do you just LOVE the new In-Colors and want to have them all? Join my In-Color Club and get a fantastic selection of products featuring the new In-Colors, at a price that doesn't make your pocketbook scream! Now you CAN get all the things!! PLUS, get a set of the new In-Color Jewels FOR FREE!! To get all the details and to sign up, click the image below. :-)
To receive the 2021-2022 Annual Catalog (Idea Book), click the image here to go to the request form!
Until Next Time,
Happy Crafting!
#TheStampinChic
Happy Crafting!
#TheStampinChic
If you would like to purchase any of the supplies I used on today's project, simply click an image below to be taken directly to my website. Enjoy!


No comments:
Post a Comment