Heya friends! How are you today? Today is Wednesday, and typically that means it's CASE-It Wednesday. Of course, it's also Day 7 of the 13 Days of Halloween Treats! I have a fun CASE-It project for you, taken from page 52 of the July/December 2021 Holiday Catalog.
* Black Glitter Paper/Grey Striped Cute Halloween DSP/Basic Black Cardstock (optional): 2" x 4 1/4"
* Polka Dot Cute Halloween DSP: 2" x 5/8"
* Window Sheet: 1 3/4" x 1 3/4"
* Basic White: 6" x 1/2" strip (for label, bats, and pumpkin)
* Basic White Scrap (with Adhesive Foam Sheet Backing) for die cut tree
* Pumpkin Pie Scrap (to die cut stars 4 times)
* Mango Melody Scrap (to die cut stars 4 times)
* 12" of Highland Heather Grosgrain Ribbon
* 12" of Silver Cord from the Simply Elegant Trim pack
I started out by die cutting the little tag, and then stamping the three bats and one pumpkin on the strip of Basic White Cardstock. When stamping the bats, I inked up in Gorgeous Grape one time and then stamped all three bats. You can see the digression of color between them. The pumpkin, of course, was stamped in Pumpkin Pie Ink. Then, the fun part! All the bats and the pumpkin are fussy cut! ACK!! I know right? But they're soooooo cute and it's sooooooo worth it when you're done!
I made a decorative top, with a hole for the ribbon, using my Fancy Tag Topper Punch on each of the three (or two if you prefer) pieces of paper. I chose to use the Basic Black as a backing to finish my tag out better because I didn't like the direction of the DSP with the striped front paper being striped vertically instead of horizontally. It made the skulls sit sideways. So I literally just glued the Basic Black piece directly to the back of the DSP to cover it up. :-D
After I cut the tops, I used the 2nd smallest Layering Circles Die to cut the opening in the Black Glitter paper. Notice that it's offset. It's that way to give the tree embellishment more room on the other side. With the opening cut, I used Multipurpose Liquid Glue to attach the 1 3/4" square of Window Sheet to the backside of it. Ya know, to close the hole back up! LOL. Now we have the window made.
The Grey Striped DSP is actually Grey and White, but I took a blending brush and Pumpkin Pie ink over the whole piece to make it Pumpkin Pie colored instead. Neat trick huh? You'll want to let that piece set for just a minute to allow the ink to fully dry before you lay the stars confetti on it. This will keep them from sticking at all.
On the backside of the Glitter piece, I added Foam Adhesive Strips around the hole into a fully closed square (to act as a guardrail for the confetti in the shaker), and then around the edges of the piece to make the tag even when it's sandwiched together. I put the pile of confetti on the grey striped panel (right about where the window would show) and then carefully lined up the Glitter piece over top, sealing it together with the foam strips. Be sure to test your shaker to make sure all is well! :-D
Last thing to do is add the embellishments and attach the tag to the bag. This is where you'll really appreciate that tree being die cut with the foam adhesive sheet already on the backside. It gives terrific dimension on the die cut piece and isn't a pain in the neck to try and cut tiny odd shaped dimensionals to hide behind it! PERFECTION!
Super cute isn't it? I love it! I already have a recipient in mind for this sweet treat!
I hope you enjoyed today's CASE-It project! We're halfway through the 13 Days of Halloween treats already! Wowza! It's going fast! Are you having fun? Which is your favorite so far? Let me know down in the comments! I'd love to hear.
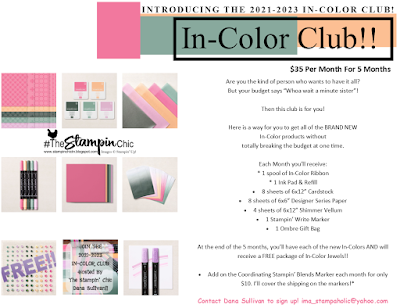
Do you just LOVE the new In-Colors and want to have them all? Join my In-Color Club and get a fantastic selection of products featuring the new In-Colors, at a price that doesn't make your pocketbook scream! Now you CAN get all the things!! PLUS, get a set of the new In-Color Jewels FOR FREE!! To get all the details and to sign up, click the image below. :-)
To receive the 2021-2022 Annual Catalog (Idea Book), click the image here to go to the request form!
Until Next Time,
Happy Crafting!
#TheStampinChic
Happy Crafting!
#TheStampinChic
If you would like to purchase any of the supplies I used on today's project, simply click an image below to be taken directly to my website. Enjoy!


No comments:
Post a Comment