Pages

Wednesday, September 29, 2021

CASE-It Wednesday Candy Cane Wishes

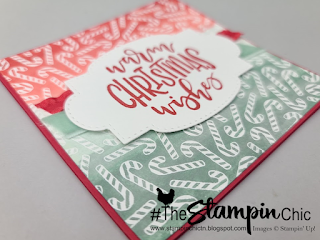
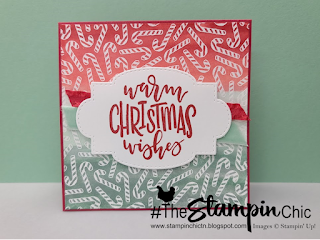
Hey hey hey my friends! How are ya today? I have a fun and sweet CASE-it project for you today.  It comes from page 34 of the July-December 2021 Holiday Brochure.  It's the card that brought my eye to the Candy Canes Background Stamp. 


Maybe one of the biggest things that drew me to this card, is that it features one of my favorite techniques! I love the emboss resist technique!  You can get some really dramatic results (like with Joseph's Coat) or something more soft and subtle like this! It's so pretty and no matter how long I've been stamping, embossing always amazes me!


So if you'd like to CASE this card with me, here's what you'll need: 

* 8 1/2" x 4 1/4" Real Red Cardstock (scored at 4 1/4") for card base
* (2) 4 1/8" x 4 1/8" Basic White Cardstock for card front and inside panels
* 4 1/8" x 1 1/4" Basic White Cardstock for inside strip
* Scrap of Basic White Cardstock big enough to die cut the Stitched So Sweetly Label
* 4 1/4" lengths of the Real Red Ruffled Ribbon and the Soft Velvet Mint Macaron Ribbon
* Candy Canes Background Stamp
* White Emboss Powder
* Versamark Ink
* Heat Tool
* Water Painters
* Real Red, Mint Macaron, and Evening Evergreen Inks


If you'd like to watch how I made this card, you can see it here: 


First, I embossed the candy cane background on one of the White layers.  I stamped in Versamark ink and then used White Emboss powder.   On this card, I  wet washed color over the embossed piece with a Water Painter and the three inks (in sections).   In the video, I used blending brushes and showed the comparison in techniques.  So you can see both techniques side by side there.  I have trouble "waiting" for the paper to dry, so I used my heat tool to lightly dry out the paper (but not reactivate my embossing). 

I attached the embossed layer to the card front and then added a little Seal adhesive to the middle so that it would hold the ribbon strips to the top.  The sentiment is from the Encircled In Warmth Stamp Set and is stamped in Real Red Ink on the Stitched So Sweetly diecut label.  It's attached to the card front with dimensionals. 

For the inside, I attached the 4 1/8" White Panel, and then attached the 1 1/4" strip that I had stamped with the candy canes using Real Red ink.  To get a visual of that, reference the video. :-) 


I hope you enjoyed this fun card! Christmas will be here before we know it.  ACK!!

Registration is open NOW for the upcoming Beautiful Tomorrow Blue Ridge Stampin' Escape with me and my friend Wendy!  Join us for a fun and exciting Stamping Experience full of amazing products and gorgeous projects! Get all the details and register by clicking the image here: 


It is also almost the end Sale-a-bration! You still have a few days to get some of these free items! To see all the must have Sale-a-bration options, click the image below:


Sign up for the Starter Kit and not only enjoy a discount on all your purchases, but also choose one of these fabulous bundles FOR FREE!!!  Choose $125 worth of product and pay only $99 (plus tax).  Get FREE SHIPPING on top of it all!! YAY! Click the image below to join!

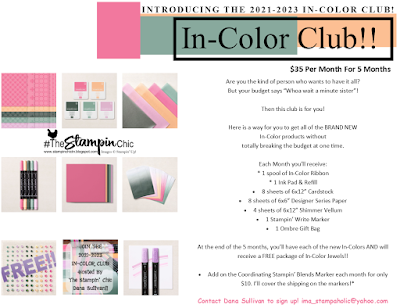
Do you just LOVE the new In-Colors and want to have them all?  Join my In-Color Club and get a fantastic selection of products featuring the new In-Colors, at a price that doesn't make your pocketbook scream! Now you CAN get all the things!! PLUS, get a set of the new In-Color Jewels FOR FREE!!  To get all the details and to sign up, click the image below. :-) 


To receive the 2021-2022 Annual Catalog (Idea Book), click the image here to go to the request form!


Until Next Time,
Happy Crafting!
#TheStampinChic

If you would like to purchase any of the supplies I used on today's project, simply click an image below to be taken directly to my website. Enjoy!

Product List

Tuesday, September 28, 2021

Paper Pumpkin Possibilities Haunts and Harvest


Good evening everybody!!  I'm so glad you're here! This evening, we're hopping with the Paper Pumpkin Possibilities Design Team to bring you some awesome alternative projects for the Haunts and Harvest September 2021 Paper Pumpkin Kit. 


Aren't those little treat holders adorable?  And how about that AWESOME little wheelbarrow?!  SO CUTE!!  Paper Pumpkin did a little video to show how to create this sweet BONUS from the box. Check it out here: 

The kit has lots of goodies inside and a stamp set that is absolutely PERFECT for the upcoming fall season! I love the two step stamped leaves!  The ink pad for this kit was Soft Succulent.  It fits in nicely with the kit.


The kit makes these cute treat holders, but what if you have no use for treat holders? What do you do then?  Well, I created this fun little card from one of the treat holders. I really like how it turned out. And, this is a lot easier to stick in the mail than a treat box. hehe. 


I started with a Poppy Parade Card Base (8 1/2" x 5 1/2" scored at 4 1/4"), and added a 5 3/8" x 4 1/8" layer of Pumpkin Pie Cardstock. The 5 1/4" x 4" Designer Series Paper layer is from the Harvest Meadow pack.

To create the pumpkins, I separated each section of the treat holder.  I set aside the hexagon shape. I'm sure I'll use that for something later!  I trimmed down each of the panels just a bit. I rounded both ends a little and evened up the sides, removing the pointy middles. Then, I used a sponge dauber and Pumpkin Pie Ink to go around the edges of each of the panels.  I assembled them by layering the middle panel slightly over the inside edges of the other two panels.  The pumpkin on the left has the center section raised up on dimensionals.  Both pumpkins look great, so I don't know if that was really necessary or not.  I removed the wire from one of the twisty stems in the kit, and used about a 1" piece twisted up for each stem. They're attached with Stampin' Seal to the back of the pumpkin's center panel.  The die cut leaves from the kit fit these pumpkins perfectly! I used a couple of the black vinyl faces that came in the kit to put on my pumpkins.  I debated on this step for a few minutes because the pumpkins looked super cute already and adding faces makes them HALLOWEEN vs FALL.  Well, I planned to stamp Happy Halloween on a tag anyways, so why not?! lol.  

Before I adhered the pumpkins to the card base, I used the remaining strip of twisty paper to make a band across the card front. You can see where I tore the 1" sections from each end to give a little texture to the band. 

I used a label from the kit and stamped "Happy Halloween" in Memento Black and attached it with dimensionals.  I tied a small bow with linen thread and frayed the ends to make it look a little fuller. Then attached it to the hole of the tag with a glue dot. 

A few of the yellow Rhinestones from the Holiday Basic Rhinestone Jewels pack finished the card off nicely, I think! 

I hope you enjoyed my card!  I had so much fun with it!!  

Be sure to check back later this week for more Paper Pumpkin alternative projects! 

In the meantime, click the NEXT button to visit Lisa Ann's blog and see what fantastic creation she has in store for you! Don't forget to hop all the way around, to ensure you don't miss any of the alternative projects!
Registration is open NOW for the upcoming Beautiful Tomorrow Blue Ridge Stampin' Escape with me and my friend Wendy!  Join us for a fun and exciting Stamping Experience full of amazing products and gorgeous projects! Get all the details and register by clicking the image here: 


It is also almost the end Sale-a-bration! You still have a few days to get some of these free items! To see all the must have Sale-a-bration options, click the image below:


Sign up for the Starter Kit and not only enjoy a discount on all your purchases, but also choose one of these fabulous bundles FOR FREE!!!  Choose $125 worth of product and pay only $99 (plus tax).  Get FREE SHIPPING on top of it all!! YAY! Click the image below to join!

Do you just LOVE the new In-Colors and want to have them all?  Join my In-Color Club and get a fantastic selection of products featuring the new In-Colors, at a price that doesn't make your pocketbook scream! Now you CAN get all the things!! PLUS, get a set of the new In-Color Jewels FOR FREE!!  To get all the details and to sign up, click the image below. :-) 


To receive the 2021-2022 Annual Catalog (Idea Book), click the image here to go to the request form!


Until Next Time,
Happy Crafting!
#TheStampinChic

If you would like to purchase any of the supplies I used on today's project, simply click an image below to be taken directly to my website. Enjoy!

Product List